Building Your Developer Portfolio: The Modern Way
Let’s face it—as developers, we spend more time optimizing our VS Code setup than building our portfolios. But in 2026, your GitHub profile alone isn’t enough. You need a portfolio that’s as performant as your code, as sleek as your terminal setup, and actually represents the kind of engineer you are.
That’s where this Astro-powered portfolio comes in. No bloated frameworks, no unnecessary JavaScript bundles, just pure speed and developer experience that actually makes sense.
Why Another Portfolio Template?
Because most portfolio templates are slow, overcomplicated, or look like they’re stuck in 2015.
This isn’t just another Bootstrap template with some jQuery animations. We’re talking about:
- Astro for near-zero JS in production (because why ship what you don’t need?)
- Island Architecture that only hydrates what’s interactive
- Type-safe content with Zod schemas (catch errors before deployment)
- MDX support for when markdown isn’t enough
- React components where it actually makes sense
- Tailwind CSS for utility-first styling without the CSS bloat
🚀 What’s Under the Hood
This portfolio template comes packed with features that developers actually care about:
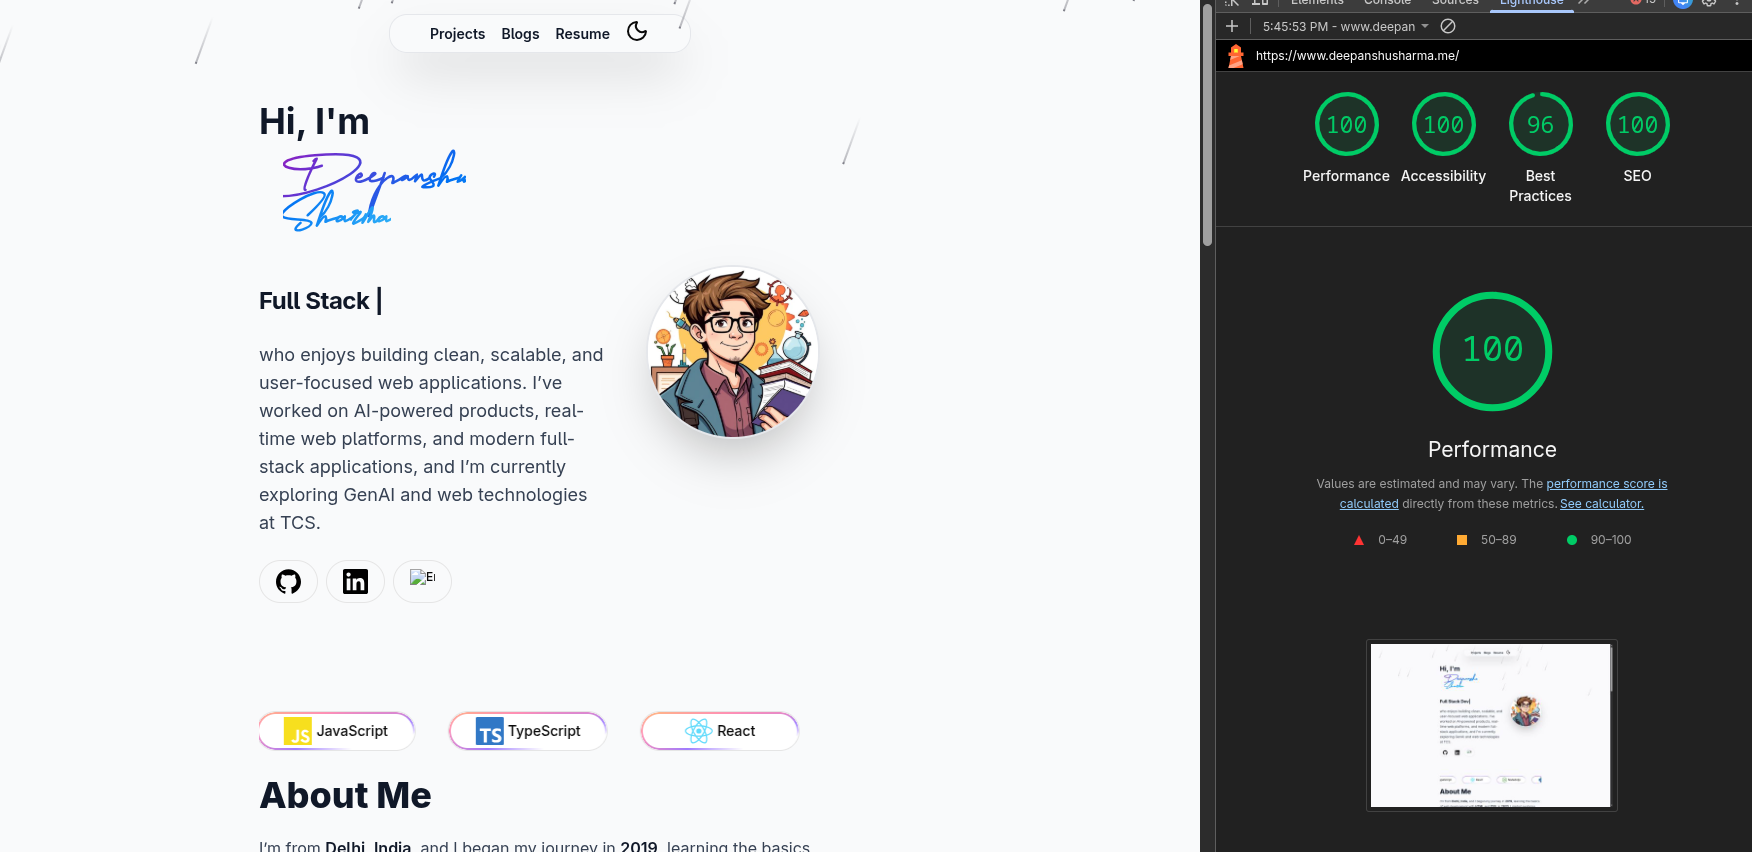
- ⚡ Sub-second load times – Astro’s partial hydration means 90+ Lighthouse scores out of the box
- 🎨 Beautiful UI components – Pre-built React components with Tailwind CSS (no fighting with CSS modules)
- 📝 Content-first blogging – Write in Markdown, get a blog. It’s that simple
- 🎯 Type-safe content – YAML schemas validated with Zod (because runtime errors are for production)
- 💼 Dynamic project showcase – Add projects via YAML, no JSX editing required
- 🌓 Animated theme toggle – Dark mode that doesn’t make your eyes bleed
- 📱 Mobile-first responsive – Looks good on everything from iPhone SE to ultrawide monitors
- 🔍 SEO & OG tags – Because discoverability matters
- 🎭 Cool animations – Meteors, particles, aurora text, and more (toggle-able, not overwhelming)
📋 Prerequisites
Before we dive in, make sure your dev environment has:
- Node.js v18.0+ (v20 recommended for maximum performance)
- npm or pnpm (pnpm is faster, but npm works fine)
- Git (obviously)
- VS Code with Astro extension (trust me, the IntelliSense is worth it)
📦 Installation
Step 1: Clone the Repository
First, clone the repository to your local machine:
git clone https://github.com/Deepanshu291/Astro-Portfolio.git
cd Astro-Portfolio
Step 2: Install Dependencies
Install all the required dependencies using npm or pnpm:
# Using npm
npm install

# Or using pnpm
pnpm install
Step 3: Start the Development Server
Run the development server to see your portfolio in action:
npm run devYour portfolio should now be running at http://localhost:4321 🎉
⚙️ Configuration
Customizing Your Profile
The main profile information is stored in src/content/profile.yml. Open this file and update it with your details:
profile:
  name: "Your Name"
  title: "Your Professional Title"
  greeting: "Hi, I'm"
  tagline: "Your tagline here"
  description: >
    Your bio description goes here.
    Tell people about yourself and what you do.
  email: "your.email@example.com"
  location: "Your City, Country"

  roles:
    - "Full Stack Developer 🚀"
    - "Your Role 🤖"

  image: "your-image-url-here"

  social:
    - name: "GitHub"
      url: "https://github.com/yourusername"
      icon: "github"
      username: "@yourusername"

    - name: "LinkedIn"
      url: "https://linkedin.com/in/yourusername"
      icon: "linkedin"
      username: "yourusername"

  skills:
    - "javaScript"
    - "typeScript"
    - "react"
    # Add your skills here
Adding Projects
Edit src/content/projects.yml to add your projects:
title: "My Projects"
heading: "Things I've Built"
description: "A collection of my work"

projects:
  - title: "Project Name"
    dates: "Jan 2026 - Present"
    sourceUrl: "https://github.com/yourusername/project"
    description: "Brief description of your project"
    imageUrl: "project-image-url"
    projectUrl: "https://your-project-demo.com"
    techStack:
      - "React"
      - "Node.js"
      - "MongoDB"
Adding Work Experience
Update src/content/workexp.yaml with your professional experience:
experience:
  heading: "Where I've Worked"
  jobs:
    - company: "Company Name"
      position: "Your Position"
      location: "City, Country"
      startDate: "Jan 2026"
      endDate: "Present"
      description: "Brief description of your role"
      responsibilities:
        - "Key responsibility 1"
        - "Key responsibility 2"
        - "Key responsibility 3"
      techStack:
        - "Technology 1"
        - "Technology 2"
      highlights:
        - "Achievement 1"
        - "Achievement 2"
✍️ Writing Blog Posts
Creating a New Blog Post
- Create a new markdown file in
src/content/blogs/:
touch src/content/blogs/my-first-post.md- Add the frontmatter and content:
---
title: 'My Awesome Blog Post'
description: 'A brief description of the post'
pubDate: '2026-01-28'
heroImage: '/blog-images/my-post.jpg'
tags: ['JavaScript', 'Tutorial']
readtime: '5 min'
---
# My Awesome Blog Post
Your content goes here! You can use **markdown** to format your text.
## Code Examples
You can include code snippets:
\`\`\`javascript
function hello() {
console.log("Hello, World!");
}
\`\`\`
## Images
Blog Post Schema
The blog posts must follow this schema (defined in content.config.ts):
- title (required): The title of your blog post
- description (optional): A short description
- pubDate (required): Publication date in YYYY-MM-DD format
- tags (optional): Array of tags
- readtime (optional): Estimated reading time
- heroImage (optional): Hero image URL
🎨 Customizing Components
Modifying UI Components
All UI components are located in src/components/ui/. You can customize them to match your style:
// Example: Customizing the badge component
// src/components/ui/badge.tsx

import { cn } from "@/lib/utils"

export function Badge({ children, className }: BadgeProps) {
  return (
    <div className={cn(
      "px-3 py-1 rounded-full bg-primary text-white",
      className
    )}>
      {children}
    </div>
  )
}
Updating Global Styles
Edit src/styles/global.css to change colors, fonts, and other global styles:
@tailwind base;
@tailwind components;
@tailwind utilities;

@layer base {
  :root {
    --background: 0 0% 100%;
    --foreground: 222.2 84% 4.9%;
    /* Add your custom CSS variables */
  }
}
🏗️ Building for Production
When you’re ready to deploy your portfolio:
Build the Project
npm run buildThis creates an optimized production build in the dist/ folder.
Preview the Build
Test the production build locally:
npm run preview🚀 Deployment
Deploy to Vercel
- Push your code to GitHub
- Go to Vercel
- Import your repository
- Vercel will auto-detect Astro and deploy!
# Or use Vercel CLI
npm i -g vercel
vercel
Deploy to Netlify
- Build your project:
npm run build - Drag and drop the
distfolder to Netlify
Or use the Netlify CLI:
npm i -g netlify-cli
netlify deploy --prod
Deploy to GitHub Pages
Add this to your astro.config.mjs:
export default defineConfig({
  site: 'https://yourusername.github.io',
  base: '/your-repo-name',
});
Then deploy:
npm run build
# Push the dist folder to gh-pages branch
🔧 Troubleshooting
Common Issues
Issue: Dependencies not installing
# Clear cache and reinstall
rm -rf node_modules package-lock.json
npm install
Issue: Port already in use
# Use a different port
npm run dev -- --port 3000
Issue: Build errors
# Check your content schema matches your YAML/MD files
# Validate dates are in correct format (YYYY-MM-DD)
📚 Project Structure
Understanding the project structure:
portfolio/
├── src/
│   ├── components/      # Astro & React components
│   ├── content/         # Blog posts, profile, projects
│   ├── layouts/         # Page layouts
│   ├── pages/          # Routes
│   ├── styles/         # Global CSS
│   └── lib/            # Utilities
├── public/             # Static assets
├── astro.config.mjs    # Astro configuration
└── package.json        # Dependencies
🎯 Next Steps
Now that you have your portfolio set up:
- ✅ Customize your profile information
- ✅ Add your projects
- ✅ Write your first blog post
- ✅ Update the styling to match your brand
- ✅ Deploy to production
- ✅ Share it with the world!
💡 Tips & Best Practices
- Keep it updated: Regular updates show you’re active
- Write blog posts: Share your knowledge and experiences
- Optimize images: Use WebP format for better performance
- SEO matters: Fill in meta descriptions and titles
- Test responsiveness: Check on different devices
- Analytics: Add Google Analytics to track visitors
Happy coding! 🚀 If you have any questions or run into issues, feel free to open an issue on GitHub.